Its fully working
Oh dear- it’s got pretty out of date!
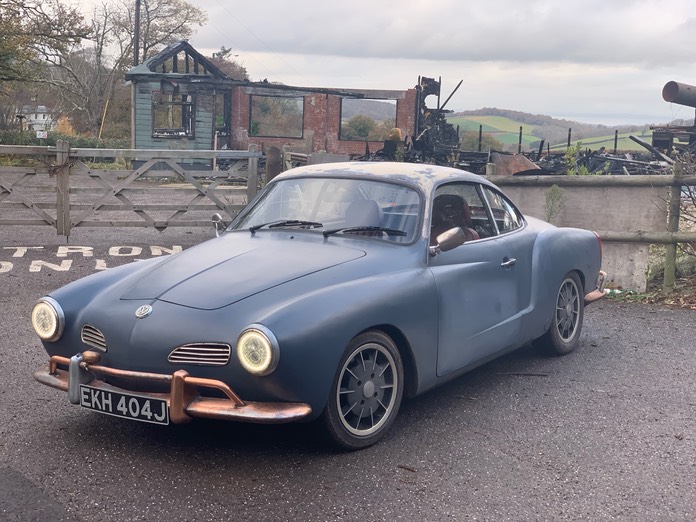
The car is basically complete, and has been running for a little while. A couple of things needed ironing out, but I am driving around quite happily, taking the car whenever possible (I still need the van to carry the double bass!)
The suspension needed beefing up. It is running on Spax coilovers which needed heavier springs, as there is approximately 300Kg extra in both the front and the back. 275s in the front, and 325s at the back.
I had to tweak the brain settings a few times: I was getting an overvoltage error if the batteries were fully charged and I had too much regen. Dialled down the maxvoltage setting on the charger and all is ok.
Range is tested to 150 miles between charges. I should be able to get 180, but don’t actually want to run it dry to find out! I’ve recalibrated the speedo to allow for smaller tyres (oh yes- I put even smaller tyres on!) so the odometer will actually claim 200 miles before the juice runs out, but it is 180 miles in reality.
What else? Oh, you just want to see some pictures? Fair enough.

But then I got rid of the ‘looks like rust’ paint… under it was a layer of silver hammerite, a layer of dirt, and several layers of original pain, and a fair bit of rust. Ruty looking paint on top of actual real rust? Go figure. So it is now in a kind of grey primer awaiting… being bothered to change it! ;-)
About time I updated this...
Lots of wiring done. And I do mean lots. All the Extra 12v Brain wires, the 240v charger wires, the 120v battery feed wires, and I ain’t started on the main power cables yet!
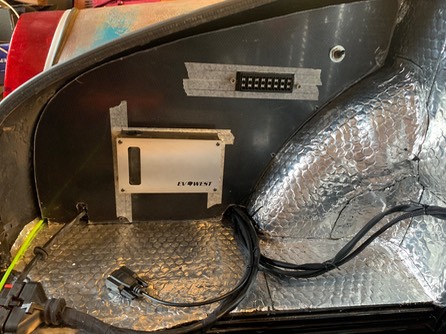
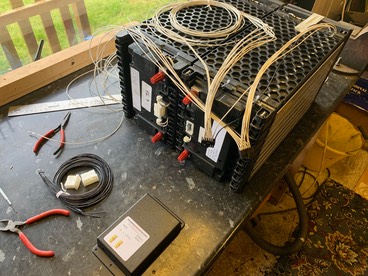
(Left). This is the charger unit. (240V mains to 120v battery voltage)
Contractor box in situ. (right)
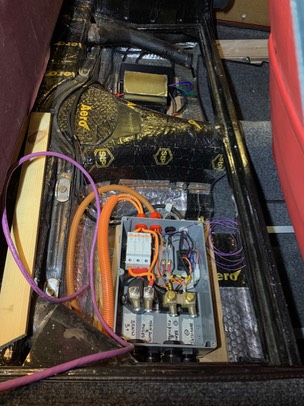
Cooling pump (for the brain) and aux-rear-fusebox. (Below)
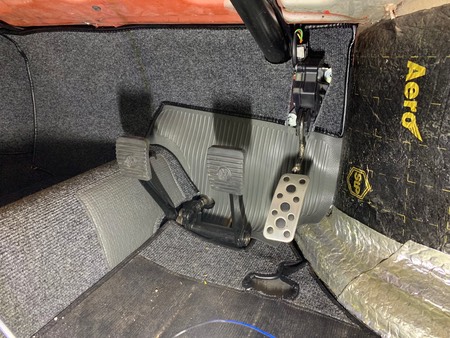
Earlier I think I mentioned a Prius throttle pedal. Didn’t sit in the right place. So this is a Subaru WRX throttle, cut and modded to be where I want it.
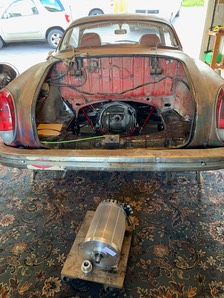
So the next news is that the battery boxes have arrived- trial-fittling them for mountings. And main cables are going to go through the centre-tunnel. Holes drilled and ready.
Meanwhile, the BMS looms will have to get made somehow…
Starting to put things in place
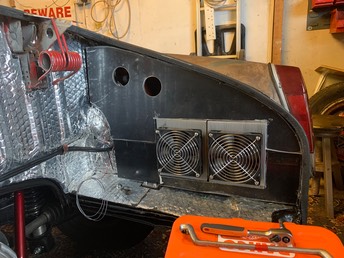
I’ve sourced some rather nice sheet for the engine bay pannelling so that’s going in at the moment. Now I can work out where everything goes, fit it up, and maybe start to run the millions of wires. It feels like I’m moving. Not the car, yet, but at least the project is progressing!
The mock-up with hardboard templates (above) and the boards (below) with markers on the protective film. Still planning where the main components will go. (I’ve already moved the markers around a bit, and btw its the lens fish-eye that makes them look skew in the picture!)

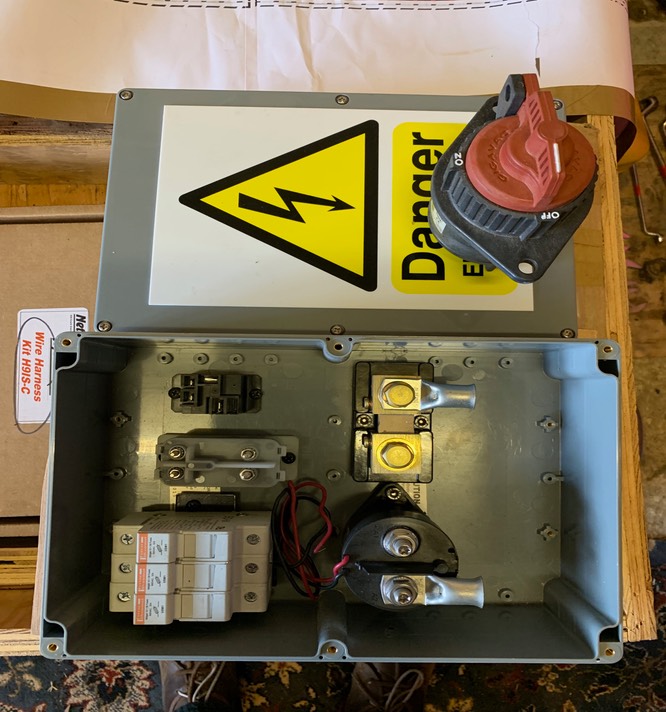
Next we have the contactor/relay/fuse box due to go under the back ‘seat’… and
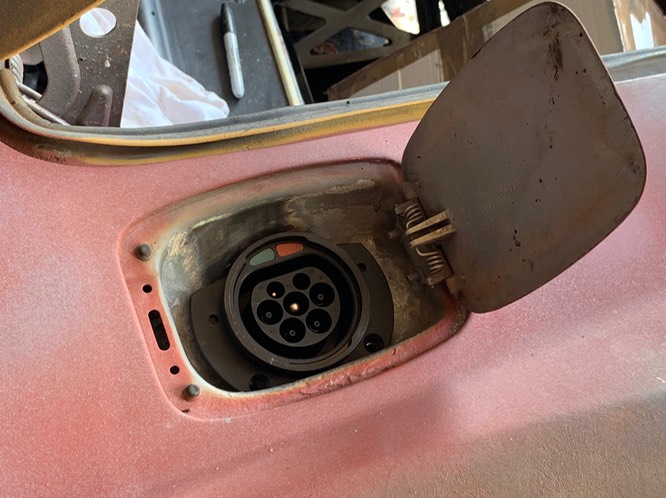
… ta-dahh! the recharge socket fitted inside the old petrol filler flap!
Starting the electricalization
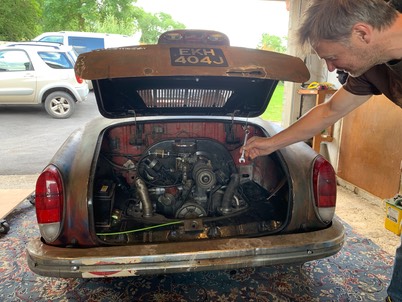
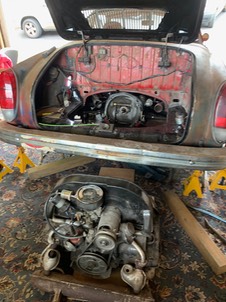
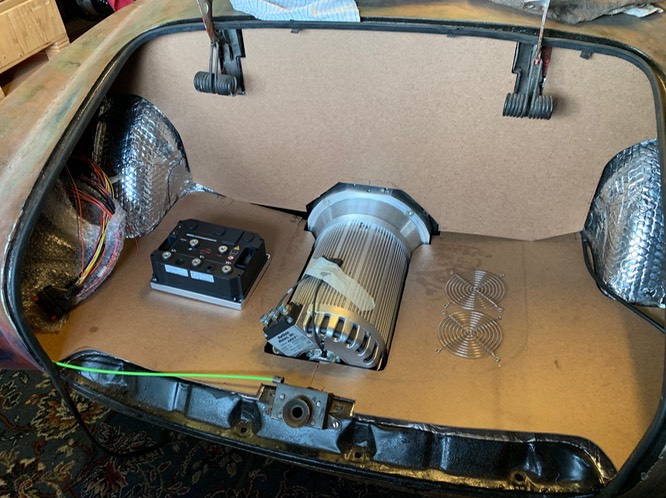
So the old stinky underpowered motor came out. And a sleek new on e went in...
This is where I’m at now, as I start this blog off. The NetGain HyPer9 motor is in place.
I’m using (basically) an EVWest kit supplied by Electric Classic Cars. Look them up for details.
I’m currently working out panelling for the engine bay, on which the controller/brain, cooling system, charging system and a whole bunch of wiring has to go.
Next up, a throttle pedal from a Prius has to be fitted, and I am trying to squeeze the charging socket under the standard wing fuel flap.
Karmann Ghia - a quick catch-up
Last year I bought a running but rather battered 1971 Karmann Ghia, with the intention of converting it to electrical power. First I did a major upgrade to the suspension and brakes, had the gearbox rebuilt uprated and re-geared, rewired it, and got rid of any rust I could find. I’m not planning on putting all of that process online (sorry), but I do intend to share the electrical conversion process.
This ain’t going to be cheap, or easy, but when I’m finished, I will be running on sunlight.
Here’s an early pic of the car…

(please note- the ‘rust’ is paint (NOT my doing!) that actually hid a certain amount of rust, which I have been busy removing. Crazy really- it could have just been covered with a rust-killing lacquer to acheive the same result. Still, each to his or her own I suppose. Eventually it may get resprayed, but for now I am more interested in function over form.
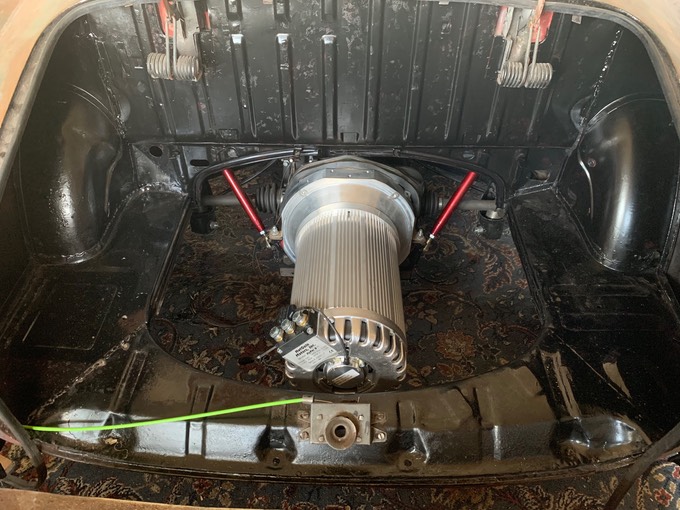
So here are two pictures of what lies underneath!
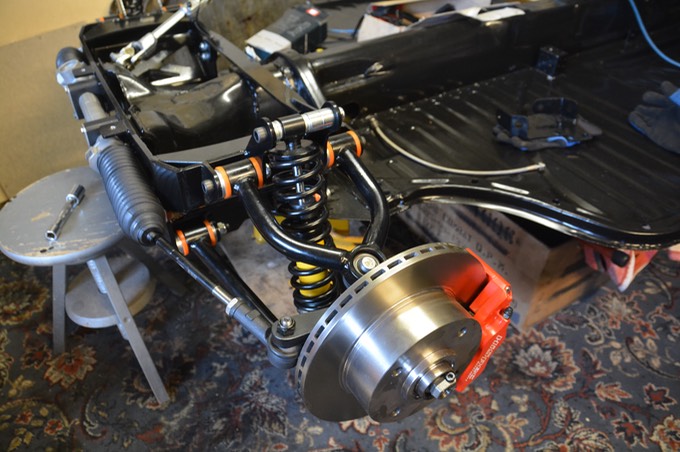

Red9Designs double wishbone front end rig with 4-pot vented disks and rack & pinion steering. it will steer and stop.
And the rear- Gearbox beefed up by Airdubs, HD driveshafts, a StiffyBar rig, and more Red9Designs suspension/brakes.
Next post- the start of the electrical conversion...